FREE SHIPPING ON ORDERS OVER $100! | SEE IF YOU QUALIFY FOR A BLASTONE CREDIT ACCOUNT x

Home / Ultrasonic Thickness Gauges Buying Guide

Ultrasonic Thickness Gauges Buying Guide

Ensuring the structural integrity of your assets requires the right tools. Ultrasonic thickness gauges (UTGs) play a vital role in non-destructive testing, helping detect corrosion, erosion, and other flaws in various materials. Here at BlastOne, we understand the importance of choosing the most suitable UTG for your specific needs. This comprehensive buying guide dives deep into the strengths and limitations of popular PosiTector UTG models like the UTG C (general corrosion), UTG M (thru-paint), UTG CLF (cast iron), and UTG P (precision).

Whether you’re a seasoned inspector or just starting your journey in material health assessment, this guide equips you with the knowledge to confidently select the UTG that optimizes your efficiency and guarantees accurate results. We’ll navigate the different UTG options, highlighting their advantages and considerations to ensure you find the perfect solution for your corrosion or erosion assessment needs.

Best Scenarios Benefits Disadvantages Options
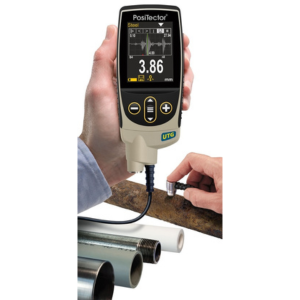
POSITECTOR UTG C SERIES (Corrosion)
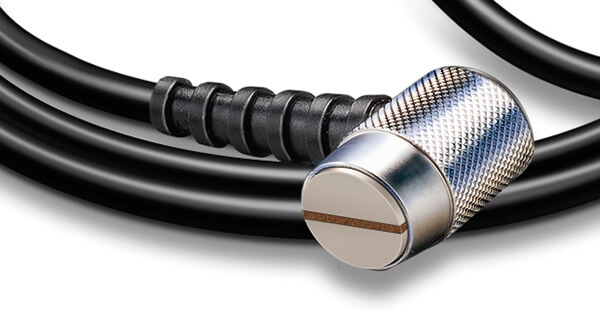
  • Measures the wall thickness of materials such as steel, plastic, and more
  • Measures the effects of corrosion or erosion on tanks, pipes, or any structure where access is limited to one side
  • Versatile – 3 probe options
  • Cost effective – Most popular and affordable choice for general corrosion assessment
  • Durable – Xtreme probe provides enhanced durability for harsh environments
  • Limited material applications
  • Does not have through paint capability
  • Standard Gage/Body w/ single probe kit
  • Advanced Gage/Body w/ single probe kit
  • Probe Kit Only (No Gage/Body)
  • Available probe options:
    • Cabled probe – UTG C
    • Integral probe – UTG CA
    • Xtreme probe – UTG CX
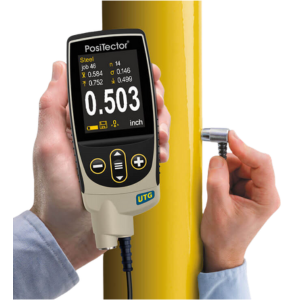
DEFELSKO® POSITEST AT-M HYDRAULIC ADHESION TESTER KIT
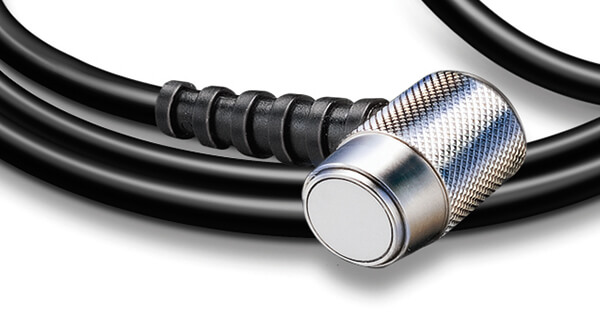
  • Measures metal thickness of a painted structure without having to remove coating
  • Ideal for measuring blasted materials and other applications requiring a more durable wear face
  • Non-Destructive Testing: Measures metal thickness through paint, eliminating the need for paint removal
  • Fast and Efficient: Multiple Echo mode provides quick and reliable thickness readings
  • Single/Multiple Echo Modes: Offers flexibility for different measurement scenarios (e.g., detecting pits vs. overall thickness)
  • Cabled probes offer less flexibility compared to integral probes, potentially limiting maneuverability in tight spaces
  • Standard Gage/Body w/ single probe kit
  • Advanced Gage/Body w/ single probe kit
  • Probe Kit Only (No Gage/Body)
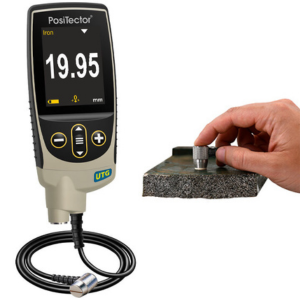
STANDARD DOLLY ADHESION TEST KIT
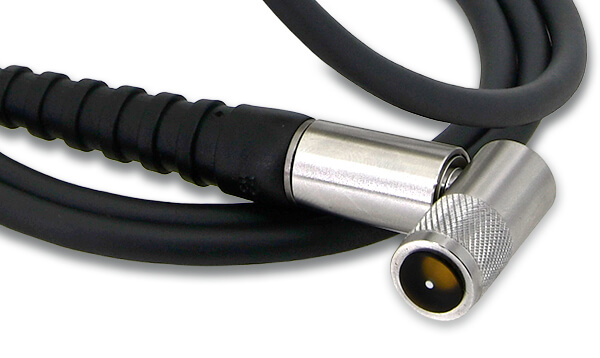
  • Measures wall thickness of attenuative materials such as cast/ductile iron, cast aluminum, and cast zinc
  • Accurate Measurements: Low-frequency transducer and algorithm specifically designed for cast iron materials
  • Overcomes Grain Noise: Distinguishes back wall reflections from grain noise commonly found in cast materials
  • Ideal for Attenuative Materials: Suitable for measuring materials like cast iron that weaken ultrasonic signals
  • Limited material applications
  • Does not have through paint capability
  • Standard Gage/Body w/ single probe kit
  • Advanced Gage/Body w/ single probe kit
  • Probe Kit Only (No Gage/Body)
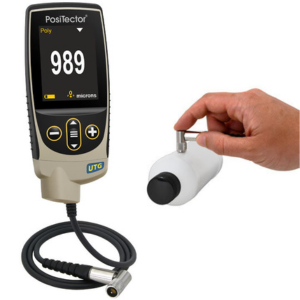
DEFELSKO CH CROSS HATCH ADHESION TESTER
  • Designed for high resolution measurements and thin materials including metals and plastics
  • High Accuracy: Precise measurements for thin materials and critical applications
  • Automatic Echo Mode Selection: Automatically selects optimal mode (single or multiple echo) for best accuracy
  • Thin Material Capability: Measures very thin materials like metals and plastics with high resolution
  • Thru-Paint Compatibility: Measures metal thickness through paint for non-destructive testing
  • Most expensive
  • Cabled probes offer less flexibility compared to integral probes, potentially limiting maneuverability in tight spaces
  • Standard Gage/Body w/ single probe kit
  • Advanced Gage/Body w/ single probe kit
  • Probe Kit Only (No Gage/Body)


POSITECTOR UTG C SERIES (Corrosion) POSITECTOR UTG M (Thru-Paint) POSITECTOR UTG CLF (Cast Iron) POSITECTOR UTG P (Precision)
Best Scenarios
  • Measures the wall thickness of materials such as steel, plastic, and more
  • Measures the effects of corrosion or erosion on tanks, pipes, or any structure where access is limited to one side
  • Measures metal thickness of a painted structure without having to remove coating
  • Ideal for measuring blasted materials and other applications requiring a more durable wear face
  • Measures wall thickness of attenuative materials such as cast/ductile iron, cast aluminum, and cast zinc
  • Designed for high resolution measurements and thin materials including metals and plastics
Benefits
  • Versatile – 3 probe options
  • Cost effective – Most popular and affordable choice for general corrosion assessment
  • Durable – Xtreme probe provides enhanced durability for harsh environments
  • Non-Destructive Testing: Measures metal thickness through paint, eliminating the need for paint removal
  • Fast and Efficient: Multiple Echo mode provides quick and reliable thickness readings
  • Single/Multiple Echo Modes: Offers flexibility for different measurement scenarios (e.g., detecting pits vs. overall thickness)
  • Accurate Measurements: Low-frequency transducer and algorithm specifically designed for cast iron materials
  • Overcomes Grain Noise: Distinguishes back wall reflections from grain noise commonly found in cast materials
  • Ideal for Attenuative Materials: Suitable for measuring materials like cast iron that weaken ultrasonic signals
  • High Accuracy: Precise measurements for thin materials and critical applications
  • Automatic Echo Mode Selection: Automatically selects optimal mode (single or multiple echo) for best accuracy
  • Thin Material Capability: Measures very thin materials like metals and plastics with high resolution
  • Thru-Paint Compatibility: Measures metal thickness through paint for non-destructive testing
Disadvantages
  • Limited material applications
  • Does not have through paint capability
  • Cabled probes offer less flexibility compared to integral probes, potentially limiting maneuverability in tight spaces
  • Limited material applications
  • Does not have through paint capability
  • Most expensive
  • Cabled probes offer less flexibility compared to integral probes, potentially limiting maneuverability in tight spaces
Options
  • Standard Gage/Body w/ single probe kit
  • Advanced Gage/Body w/ single probe kit
  • Probe Kit Only (No Gage/Body)
  • Available probe options:
    • Cabled probe – UTG C
    • Integral probe – UTG CA
    • Xtreme probe – UTG CX
  • Standard Gage/Body w/ single probe kit
  • Advanced Gage/Body w/ single probe kit
  • Probe Kit Only (No Gage/Body)
  • Standard Gage/Body w/ single probe kit
  • Advanced Gage/Body w/ single probe kit
  • Probe Kit Only (No Gage/Body)
  • Standard Gage/Body w/ single probe kit
  • Advanced Gage/Body w/ single probe kit
  • Probe Kit Only (No Gage/Body)

DeFelsko Ultrasonic Thickness Gauge (UTG) Videos

How to Measure Wall Thickness with the PosiTector UTG Ultrasonic Thickness Gage

New PosiTector Gage Body

How-To: Use Prompted Batch Mode Software

How-To: PosiTector UTG C3 Advanced in A-Scan

How-To: PosiTector UTG C3 Advanced in B-Scan

How-To: PosiTector UTG M – Thru-Paint models

PosiTector Probe Interchangeability

How to Use Ultrasonic Wall Thickness Gauges?

Why Use a Ultrasonic Thickness Gauges (UTG)? Why Measure Wall Thickness?

Erosion vs. Corrosion

Understanding the difference between erosion and corrosion is crucial for protecting your infrastructure and equipment. Here’s a quick breakdown:

  • Erosion: How a protective coating or substrate breaks down from mechanical wear and tear (friction), caused by repeated contact with liquids or solids.
  • Corrosion: This is the chemical breakdown of a substrate, often due to oxidation (rusting) in metals.

Both erosion and corrosion can lead to costly repairs and even catastrophic failures, especially in demanding environments like marine applications. This is where Ultrasonic Thickness Gauges (UTGs) come in.

Why UTGs are Essential for Erosion and Corrosion Detection

UTGs offer a safe and efficient way to inspect hidden damage without harming the equipment itself (non-destructive testing). This translates to several benefits:

  • Improved Safety: UTGs eliminate risks associated with traditional destructive testing methods.
  • Reduced Costs: Early detection of erosion or corrosion allows for timely repairs, preventing major breakdowns and saving money in the long run.
  • Enhanced Compliance: UTG inspections help ensure your equipment meets industry safety codes and regulations.

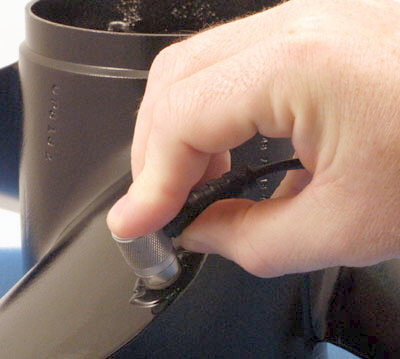
For instance, a seemingly minor propeller blade erosion can lead to decreased efficiency, higher fuel consumption, and increased vibration. UTGs can identify such issues early on, preventing further damage and optimizing performance.

Ready to learn more about UTGs and how they can combat erosion and corrosion? Read our comprehensive article “Measurement of Effects of Erosion and Corrosion.”

UT Measurement Applications: Ensuring Safety and Integrity in Every Industry

Ultrasonic Thickness Gauges (UTGs) empower non-destructive, precise measurements of remaining wall thickness in pipes, pressure vessels, storage tanks, boilers, and other equipment vulnerable to erosion or corrosion. This ensures safety and extends asset life across various industries.

Shipyards and Marine

The Marine Industry: A Battleground for Erosion & Corrosion

While many sectors face these challenges, the marine environment presents one of the harshest challenges for combating corrosion. Factors like seawater, humidity, wind, temperature, airborne contaminants, and even marine life accelerate corrosion rates. Additionally, erosion is prevalent due to:

  • Abrasion: Impact from water and debris wears down the substrate.
  • Impingement: Turbulent high-speed liquids cause localized erosion.
  • Cavitation: Pressure waves from collapsing air bubbles damage the material.

Erosion not only weakens the substrate but also compromises protective coatings, further accelerating corrosion. Ships, marinas, pipelines, offshore structures, and desalination plants are all susceptible to varying degrees of erosion and corrosion, making UTGs a vital inspection tool.

BlastOne has helped marine contractors implement the fastest, safest and cleanest corrosion control solutions. Learn more about our Industrial Marine Blast & Paint processes.

PosiTector UTG Probe Comparison: Selecting the Best Option for Your Needs

PosiTector UTG C: Ideal for Heavily Corroded Metals (Single Echo Probe)

The PosiTector UTG C excels at measuring the thickness of metals with severe corrosion or pitting.

It achieves this accuracy through a combination of features:

  • Dual-Element Transducer: This design optimizes signal transmission for reliable readings on rough surfaces.
  • Focused “V-Path” Technology: This innovative technology directs sound waves for precise thickness measurement, even with heavy pitting.
  • V-Path Compensation: This built-in feature automatically accounts for the sound path within the probe, ensuring accurate results.

Benefits of UTG-C:

  • Accuracy: Dual-element transducer & V-path technology deliver accurate readings on heavily corroded metals.
  • Durable & Portable: Built to withstand tough environments, compact for easy on-site inspections.
  • Wide Application Usage: Ideal for storage tanks, pipelines, bridges, marine vessels, and more.

Important Note: Unlike some UTG probes, the UTG C single echo probe does not disregard the thickness of exterior coatings. For the most accurate measurements, removing any paint or coating at the measurement point is recommended.

PosiTector UTG M: Fast and Easy Thickness Measurement Through Paint (Multi-Echo Probe)

The PosiTector UTG M uses thru-paint measurement on new or lightly corroded metals.

Here’s how it works:

  • Single-Element Transducer: This design provides a cost-effective solution for measuring through coatings.
  • Thru-Paint Capability: Multiple echoes (reflections) are analyzed to eliminate the coating thickness from the final measurement, saving you time and effort.
  • Straight-Path Sound Waves: The ultrasonic beam travels perpendicular to the surface for precise thickness readings.

Benefits of UTG M:

  • Fast and Convenient: No need to remove paint for most applications, saving time and resources.
  • Ideal for Painted Structures: Measures metal thickness directly through paint coatings.
  • Cost-Effective: Single-element transducer offers an affordable solution.

Note: While the UTG M excels at measuring through paint, it might not be suitable for heavily corroded surfaces.

PosiTector UTG P: High-Precision Measurement for Thin Materials (Precision Probe)

The PosiTector UTG P excels at measuring the thickness of very thin materials, including both plastics and metals.

Here’s what sets it apart:

  • Single-Element Delay Line Transducer: This advanced design delivers exceptional accuracy for critical applications.
  • Automatic Echo Mode Selection: No need for manual adjustments! The UTG P automatically switches between single-echo and multi-echo modes depending on material properties and thickness for optimal results.
  • Ideal for Thin Materials: This probe is specifically designed for accurate thickness measurement of materials with minimal thickness, making it perfect for tasks like:
    • Plastic components
    • Thin sheet metal

Benefits of UTG P:

  • High Accuracy: Delivers precise measurements for critical applications.
  • Versatility: Measures both plastics and metals with ease.
  • Automatic Mode Selection: Simplifies operation and ensures optimal results.

Note: Due to its focus on thin materials, UTG P might not be the best choice for measuring thicker or heavily corroded structures.

WANT TO STREAMLINE YOUR NEXT PROJECT?

Learn how to maximize your protective coating and extend the lifetime of your assets

Understanding Ultrasonic Material Velocity

Ultrasonic Material Velocity (UMV) refers to the speed at which sound waves travel through a specific material. This velocity is crucial for accurate thickness measurements using ultrasonic thickness gauges. UTGs rely on the time it takes for sound waves to travel through a material to determine its thickness. Knowing the correct UMV for the material being measured ensures accurate thickness readings.

Challenges of UMV:

  • Material variations: UMV can vary based on factors like temperature, composition, and grain structure.
  • Pre-programmed limitations: UTGs often come with pre-programmed velocities for common materials, but these might not be exact for every scenario.

Optimizing UMV for Accuracy:

  • Reference materials: For the most precise results, it’s recommended to measure the velocity on a sample of the same material with a known thickness.
  • UTG features: Some UTGs, like PosiTector UTG, allow you to enter custom velocities for greater accuracy.

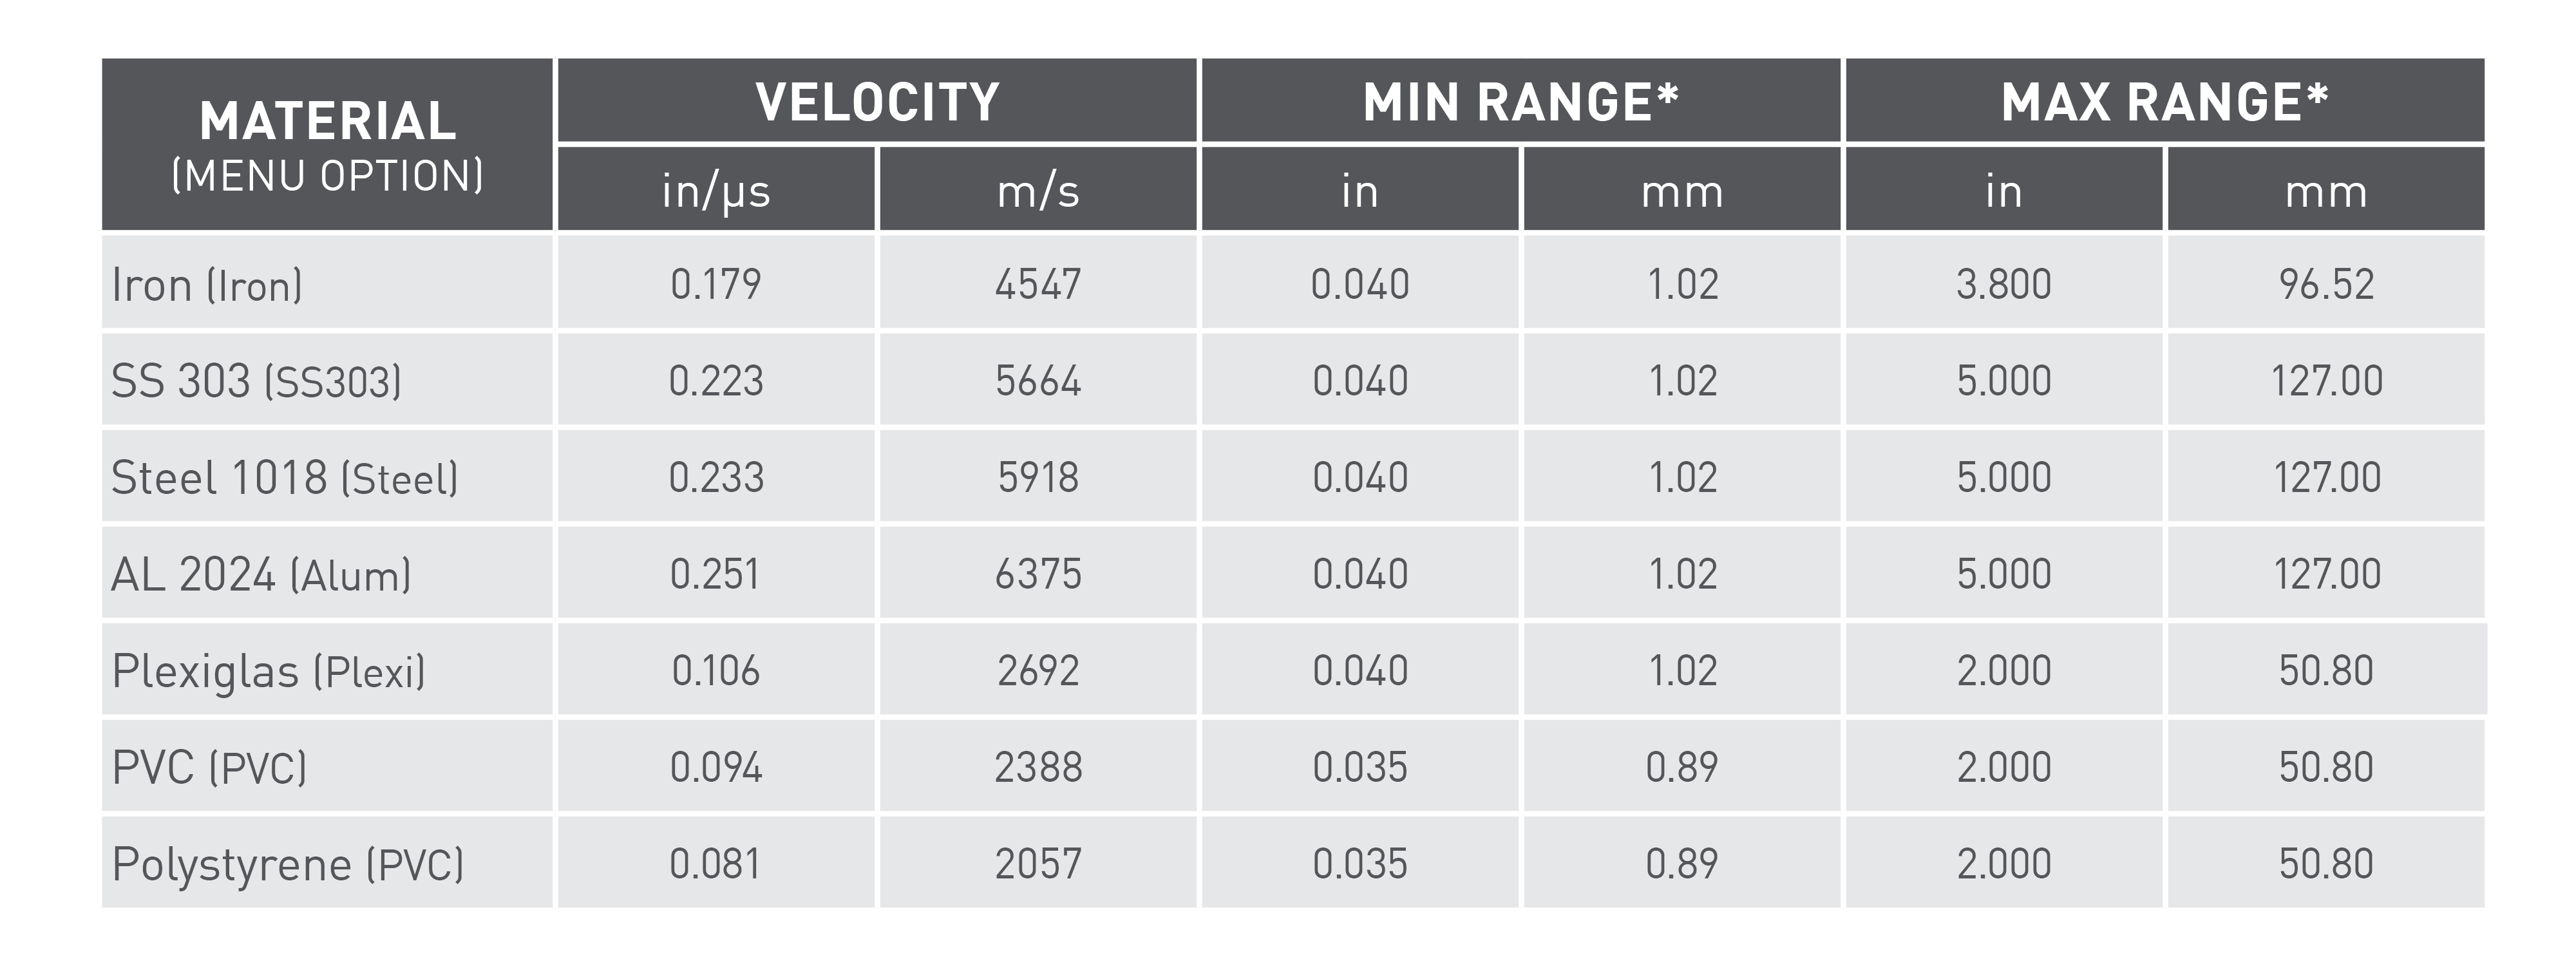
Common Material Velocities:

The table below provides a general reference for the longitudinal wave ultrasonic velocities of common materials.

* Range may change depending on surface roughness, temperature, or material properties

How Ultrasonic Thickness Gauges Work

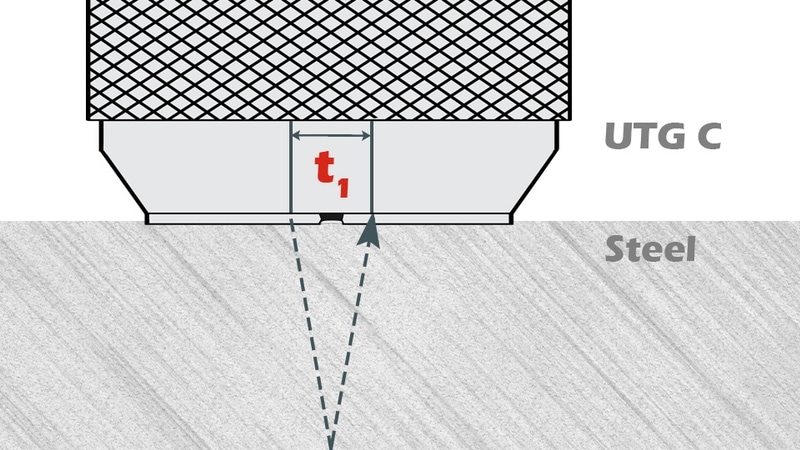
PosiTector UTG probes function by sending an ultrasonic pulse into the material. This sound wave travels through the material until it hits a boundary, like air or another material, and bounces back. The UTG measures the time it takes for the sound wave to travel this round trip (represented as t1 and t2) to determine the material’s thickness.

Single Echo

Single-echo PosiTector UTG C probes feature a dual element transducer with automatic V-Path compensation. Thickness is determined by measuring t1 (uncoated) or t2 (coated), dividing it by two and then multiplying by the velocity of sound for that material (steel).

For uncoated materials, t1 related directly to material thickness. When a material is coated, the propagation time is increased and is shown above as t2.

Coatings such as paint have a slower velocity of sound than that of metal. Thus the single echo technique will produce a thickness result greater than the actual combined coating and metal thickness. The result will include a significantly higher, unknown value of paint thickness. Therefore, it is not a simple matter of measuring the thickness of the paint and subtracting it from the single echo measurement result.

Multiple Echo

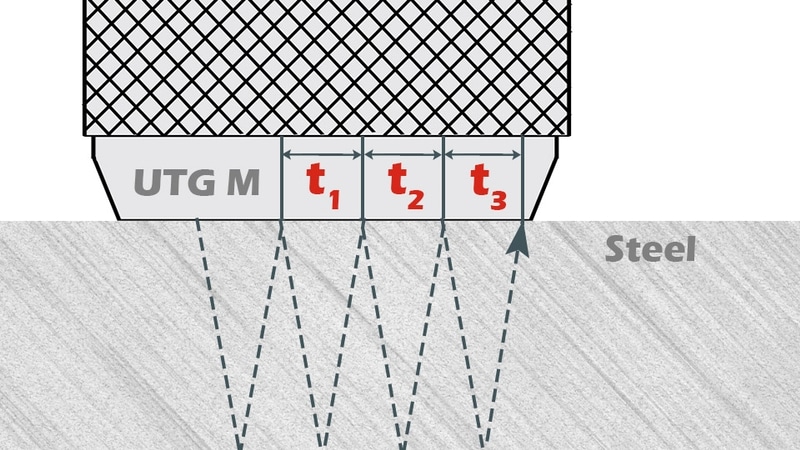
The PosiTector UTG M and UTG P ultrasonic thickness probes in multiple-echo mode determine thickness by measuring the time between at least three consecutive back wall echoes.

In the figure above, multiple echo mode measures only the time between echoes. Regardless of whether the steel is coated or not, all times between echoes are the same. In multiple-echo mode, the thickness meter determines thickness by measuring t1 + t2 + t3, dividing it by six and then multiplying by the velocity of sound for that material. The resultant thickness calculation made by the instrument is therefore an accurate measurement of the steel thickness only, disregarding the coating thickness.

The velocity of sound is expressed in inches per microsecond or meters per second. It is different for all materials. For example, sound travels through steel faster (~0.233 in/µs) than it travels through plastic (~0.086 in/µs).

Frequently Asked Questions

  • Is the PosiTector UTG calibrated at the factory?

    The PosiTector UTG arrives fully calibrated and ready to measure. A Long-Form Certificate of Calibration traceable to NIST is included, which documents actual readings taken by your instrument at our calibration laboratory on standards traceable to a national metrology institute. Beware of ‘Certificates’ or ‘Certificates of Conformance’ offered by competitors. These typically do not include actual instrument readings, and are often insufficient to meet common quality requirements.

    Verification of gage calibration and accuracy can be performed with the accessory Certified Step Block. If necessary, the PosiTector UTG operator can easily perform a calibration adjustment to align the gage’s thickness readings to match that of a known reference sample.

  • Can I measure the thickness of non-metallic materials like plastic and rubber with the PosiTector UTG?

    Yes! The PosiTector UTG features several preprogrammed sound velocities for common materials. For best accuracy, make a simple adjustment to a known sample thickness of the material or quickly enter the material’s sound velocity into the gage. The PosiTector UTG can be adjusted to a broad range of sound velocities spanning from 0.0492 to 0.393 mils/µs (1250 to 10000 m/s).
  • Can the PosiTector UTG measure cast/ductile iron or cast aluminum?

    Yes. The PosiTector UTG CLF probe was designed to measure attenuative materials such as cast metals including iron, aluminum and zinc.
  • What is the difference between the PosiTector UTG C and PosiTector UTG M?

    The PosiTector UTG C (Corrosion) single echo probe uses a dual-element transducer, a focused “V-path”, and V-path compensation to accurately measure the thickness of metals with particularly heavy corrosion or pitting. The UTG C single echo probe will not ignore the thickness of the exterior coating: for best measurement accuracy, it may be necessary to remove any coating present at the point of measurement.

    The PosiTector UTG M (Multi-echo) probe uses a single element transducer to accurately measure the metal thickness of a new or lightly corroded structure while ignoring the thickness of protective coatings. The ultrasonic beam travels in a straight path to the material’s back wall at 90° relative to the surface. When three consecutive back wall echoes are detected, the probe makes a time-based calculation to eliminate the coating thickness from the gage reading.

  • If there is paint on the surface and it can’t be removed, can the PosiTector UTG C be used?

    Yes, but coatings such as paint have a slower sound velocity than metal. This means that coating ‘appears’ much thicker to the instrument than it actually is, and can substantially affect the reading. Using Thru-Paint technology, the PosiTector UTG M and PosiTector UTG P probes disregard the exterior coating thickness on a painted metal structure and report only the metal thickness.
  • Can the UTG measure the thickness of materials with heavy corrosion on the back/inside?

    The PosiTector UTG C (Corrosion) is a proven solution for measuring the thickness of metal structures with pitting and/or moderate-to-severe corrosion on the back wall.
  • How often should the PosiTector probe be recalibrated?

    PosiTector probes include a Certificate of Calibration showing traceability to NIST or PTB included (Long Form) with each probe—with no expiry or end date. They have no shelf life, therefore the length of time in the field is not a good indicator for recalibration intervals. Many organizations with quality programs and recertification programs require annual recalibrations, and this is a good starting point for most users. DeFelsko recommends that customers establish calibration intervals based upon their own experience and work environment. Based on our product knowledge, data and customer feedback, a one year calibration interval from the date the instrument was placed in service is a good starting point.
  • What are the available probe options?

    PosiTector UTG CA / UTGC – dual element, single-echo probe ideal for measuring severely corroded/eroded materials. PosiTector UTG CA models feature a built-in probe, while PosiTector UTG C models feature a probe mounted on a 1m (3ft) cable.

    PosiTector UTG CX – same specifications as UTG C above, but includes a braided stainless steel cable jacket and reinforced strain reliefs for protection in demanding environments.

    PosiTector UTG CLF – dual element, single-echo probe designed for measuring thick and/or attenuative materials such as cast iron.

    PosiTector UTG M – single element, multiple-echo probe features Thru-Paint capability designed to quickly and accurately measure the metal thickness of a painted structure without having to remove the coating.

    PosiTector UTG P – single element probe with automatic multiple-echo or single-echo mode depending on material type and thickness, can be used for Thru-Paint applications. Ideal for high-resolution measurements on thin plastics and metals.

Related Equipment

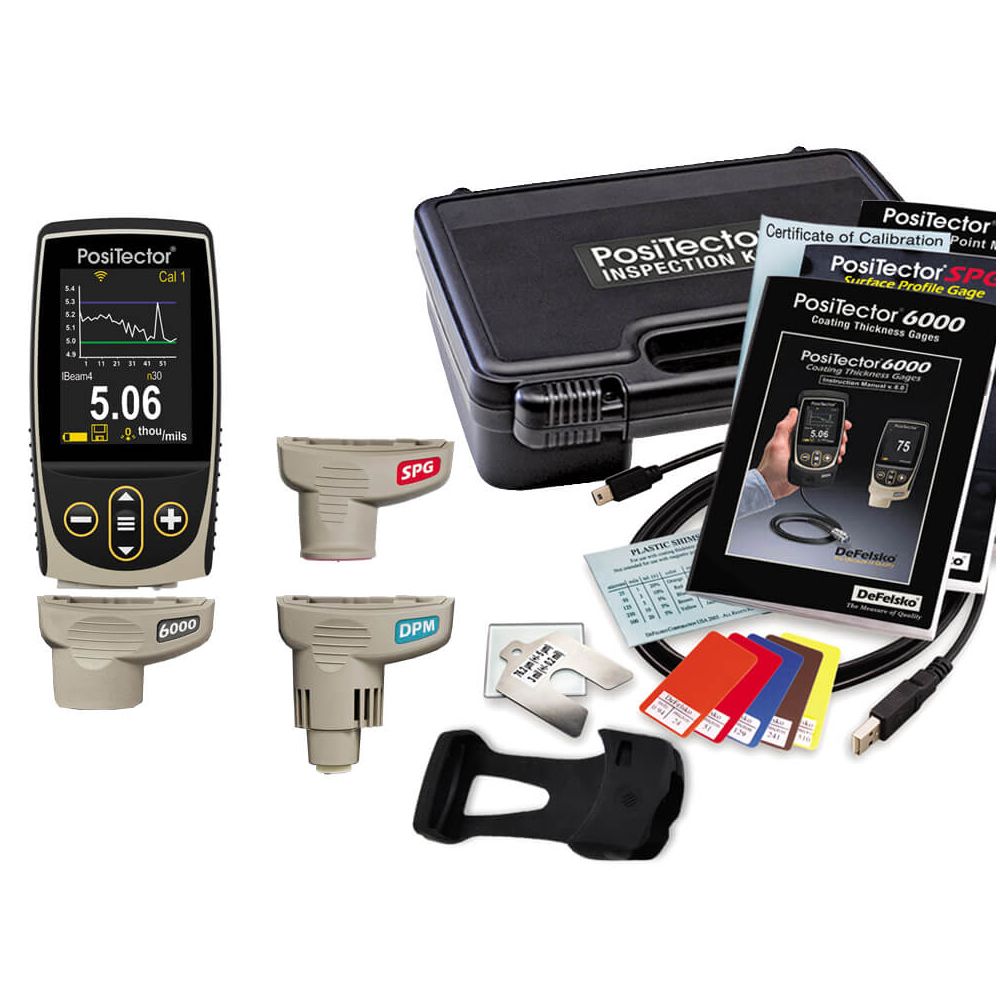
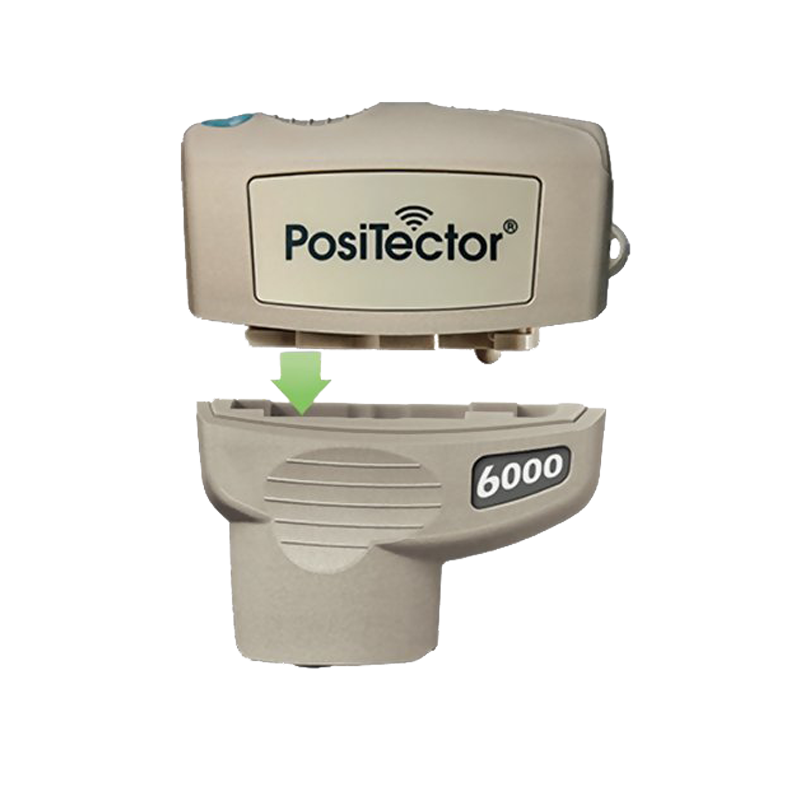
POSITECTOR® 6000 COATING THICKNESS PROBE

POSITECTOR® 200 ULTRASONIC COATING THICKNESS GAUGE

POSITECTOR® SMARTLINK WIRELESS GAUGE

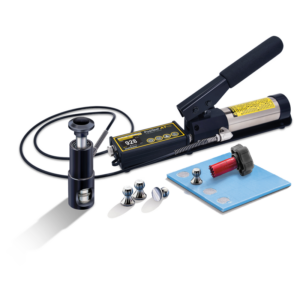
POSITEST® AT PULL-OFF ADHESION TESTERS

Contact BlastOne

We love to talk to customers and help them make the best decisions when purchasing equipment.
You can reach us via our Live Chat, Email, Phone, and Online Form.

Add to quote:

Registration is required to create a Quote.

Click Here to Login or Register.

Add to existing quote:

Add to Quote

Add to a new quote:

Send the request

BlastOne says
Thank you for submitting your quote. A sales representative will follow up with you asap.
Share Quote via Email

Share