FREE SHIPPING ON ORDERS OVER $100! | SEE IF YOU QUALIFY FOR A BLASTONE CREDIT ACCOUNT x

Home / Industrial Coatings Dry Film Thickness Instruments Buying Guide

Industrial Coating Thickness Gauges

Dry film thickness gauges and meters are used to measure the thickness of dry films on a variety of surfaces. This is important for a variety of reasons, such as ensuring that the correct amount of coating has been applied, detecting corrosion, and determining the condition of a surface.

See our range of Dry Film Thickness (DFT) Gauges and instruments. Metals, non-metals, ferrous/non-ferrous/combo, concrete, fiberglass, wood, and more.

Dry Film Coating Thickness Instruments

Available For Rent Best Scenarios Benefits Disadvantages Options
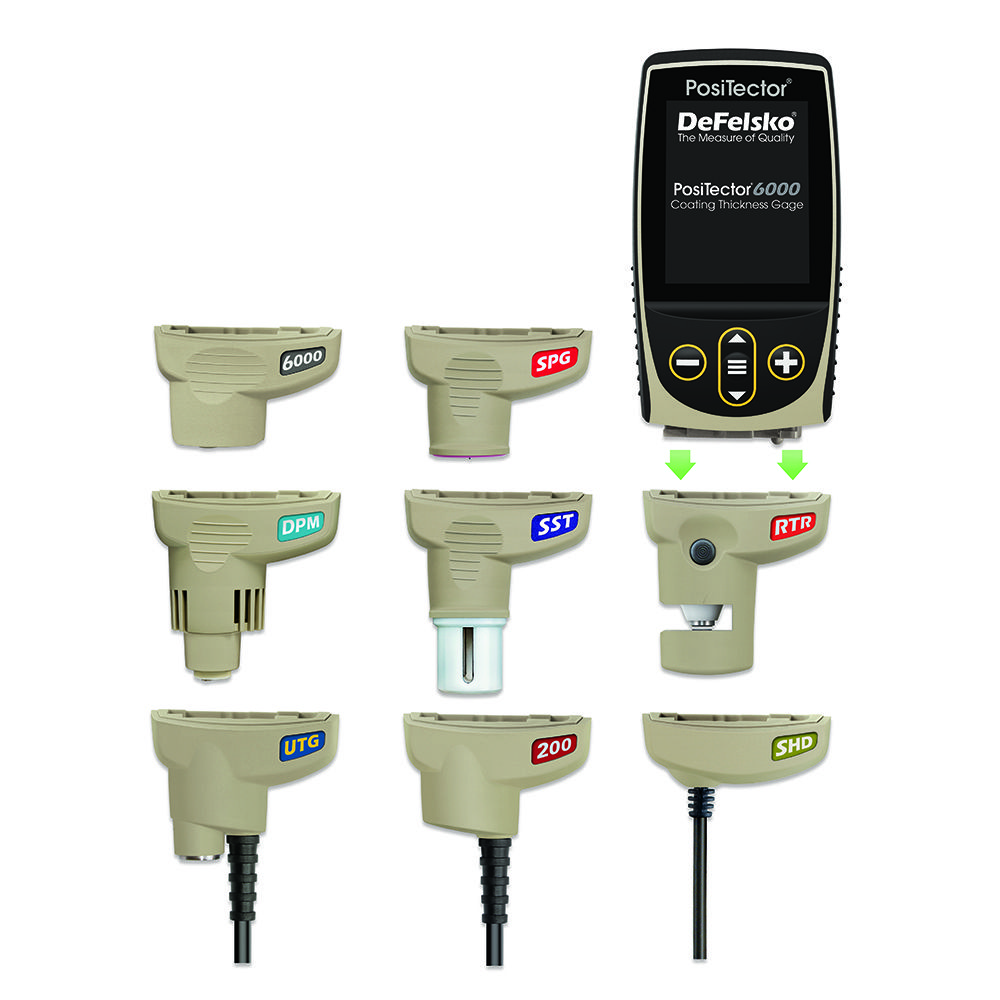
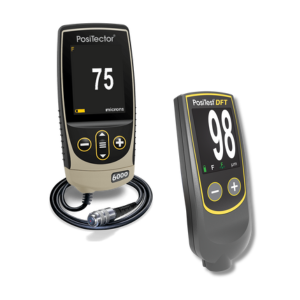
Positector 6000 Dry Film Thickness Gauge PosiTector 6000 Yes
  • All Metals
  • Paint Applicators and Contractors
  • Coating Inspectors
  • Highest levels of accuracy over metallic substrates.
  • Large storage capacity for readings
  • Extensive statistical capabilities
  • Interchangeable probes
  • 60+readings per minute
  • Industry leading accuracy
  • IP65 weatherproof case
  • Marginally slower compared to competitive unit
  • Standard Model (1k readings storage)
  • Advanced Model (250k readings storage / 1k
    batches)
  • Smartlink Model
  • Ferrous
  • Non-Ferrous
  • Combination Ferrous/Non-Ferrous
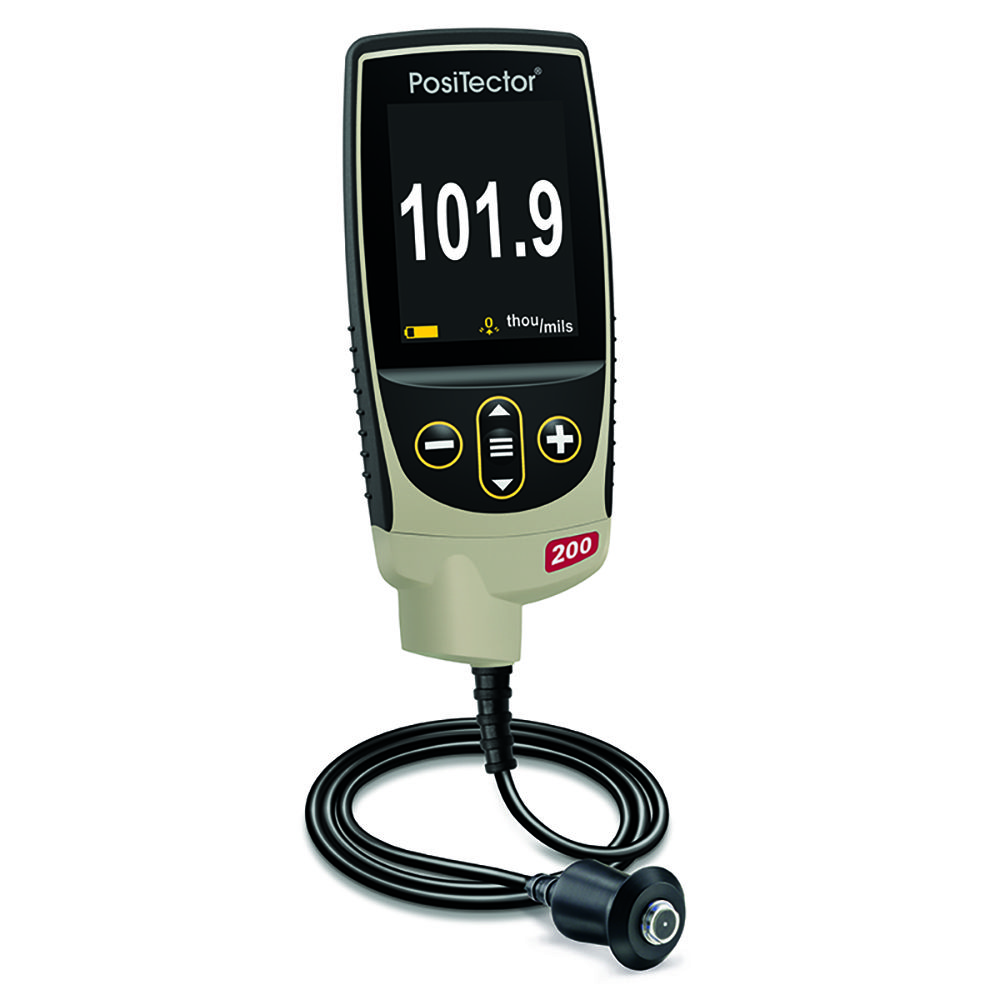
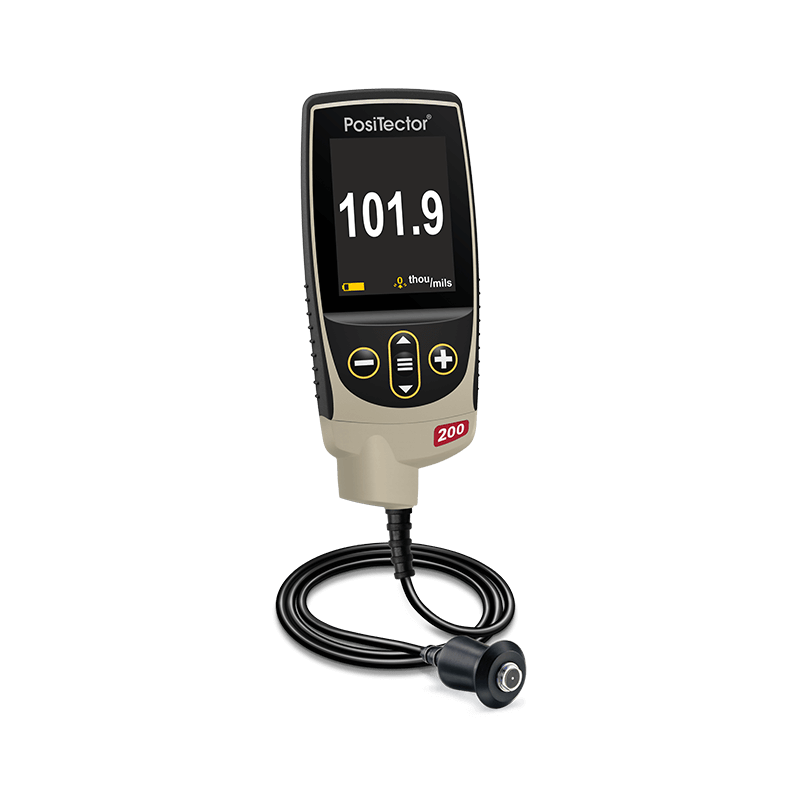
DeFelsko PosiTector 200-B Probe PosiTector 200 No
  • Non-Metals
  • Uses ultrasonic measurement
  • Works on non-metallic substrates.
  • Large storage capacity for readings
  • Statistical capabilities
  • Marginally slower compared to competitive unit
  • Standard Model (1k readings storage)
  • Advanced Model (1k readings / up to 3 individual layer thicknesses)
  • Wood/Plastics
  • Concrete/Fiberglass
  • Polyurea, asphaltic neoprene, thick polymers
  • 3 different probes for different thicknesses of coating
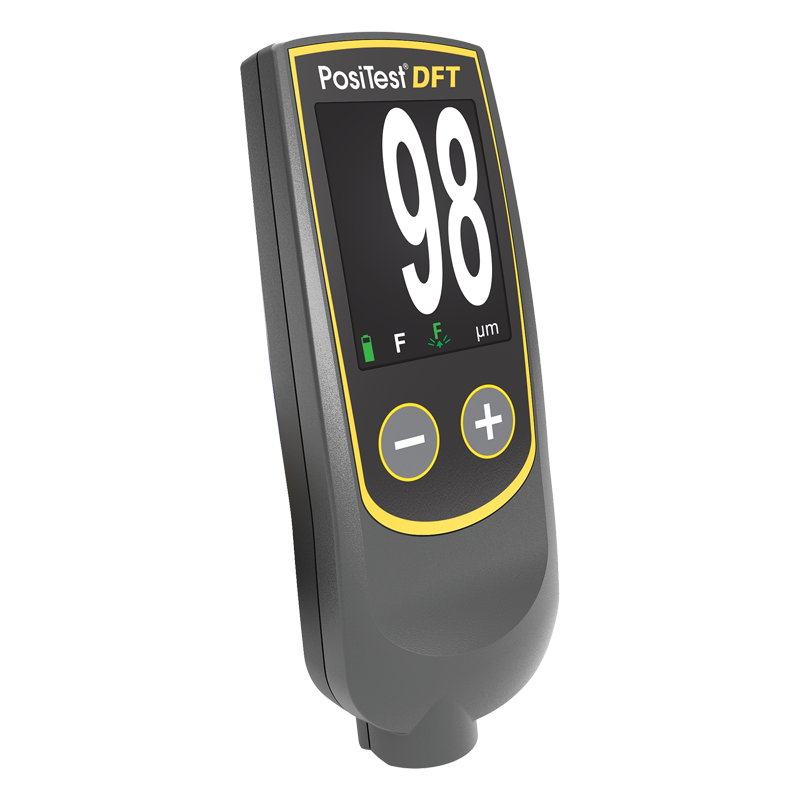
DeFelsko PosiTest DFT F/NF PosiTest DFT F/NF No
  • All Metals
  • Powder Coaters
  • Paint Applicators and Contractors
  • Coating Inspectors
  • Automotive Detailers, Refinishers and Inspectors
  • Economical
  • A quick and simple check on coating thickness
  • Ready to measure, for most applications no adjustment required
  • Not as accurate as PosiTector 6000
  • No internal memory beyond simple averaging function, unable to download results
  • Not compatible with inspection software
  • Ferrous
  • Combination Ferrous/Non-Ferrous
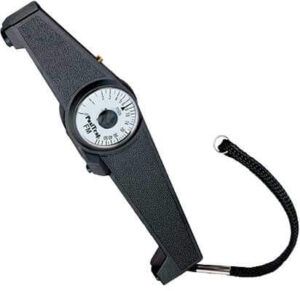
PosiTest PosiTest No
  • Steel Only
  • Magnetic Coating Thickness Gages for Non-Magnetic Coatings on Steel
  • Hot dip galvanizing, hard chrome metalizing, paint, enamel, plastic coatings on steel
  • Electroplating, thin paint films, phosphating on steel
  • Low cost
  • Intrinsically safe for explosive environments
  • Superior accuracy compared to competitive unit
  • Less accurate than electronic gauges
  • Prone to error when reading from a dial rather than digital display
  • Prone to damage when dropped
  • Four Models to choose from
    • PosiTest FM
    • PosiTest F
    • PosiTest GM
    • PosiTest

  Positector 6000 Dry Film Thickness Gauge DeFelsko PosiTector 200-B Probe DeFelsko PosiTest DFT F/NF PosiTest
PosiTector 6000 PosiTector 200 PosiTest DFT PosiTest
Available For Rent Yes No No No
Best Scenarios
  • All Metals
  • Paint Applicators and Contractors
  • Coating Inspectors
  • Non-Metals
  • Uses ultrasonic measurement
  • All Metals
  • Powder Coaters
  • Paint Applicators and Contractors
  • Coating Inspectors
  • Automotive Detailers, Refinishers and
    Inspectors
  • Steel Only
  • Magnetic Coating Thickness Gages for Non-Magnetic Coatings on Steel
  • Hot dip galvanizing, hard chrome metalizing, paint, enamel, plastic coatings on steel
  • Electroplating, thin paint films, phosphating on steel
Benefits
  • Highest levels of accuracy over metallic substrates.
  • Large storage capacity for readings
  • Extensive statistical capabilities
  • Interchangeable probes
  • 60+readings per minute
  • Industry leading accuracy
  • IP65 weatherproof case
  • Works on non-metallic substrates.
  • Large storage capacity for readings
  • Statistical capabilities
  • Economical
  • A quick and simple check on coating thickness
  • Ready to measure, for most applications no adjustment required
  • Low cost
  • Intrinsically safe for explosive environments
  • Superior accuracy compared to competitive unit
Disadvantages
  • Marginally slower compared to competitive unit
  • Marginally slower compared to competitive unit
  • Not as accurate as PosiTector 6000
  • No internal memory beyond simple averaging function, unable to download results
  • Not compatible with inspection soft ware
  • Less accurate than electronic gauges
  • Prone to error when reading from a dial rather than digital display
  • Prone to damage when dropped
Options
  • Standard Model (1k readings storage)
  • Advanced Model (250k readings storage / 1k
    batches)
  • Smartlink Model
  • Ferrous
  • Non-Ferrous
  • Combination Ferrous/Non-Ferrous
  • Standard Model (1k readings storage)
  • Advanced Model (1k readings / up to 3 individual layer thicknesses)
  • Wood/Plastics
  • Concrete/Fiberglass
  • Polyurea, asphaltic neoprene, thick polymers
  • 3 different probes for different thicknesses of coating
  • Ferrous
  • Combination Ferrous/Non-Ferrous
  • Four Models to choose from
    • PosiTest FM
    • PosiTest F
    • PosiTest GM
    • PosiTest G

Available For Rent Best Scenarios Benefits Disadvantages Options
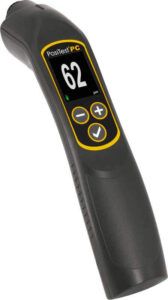
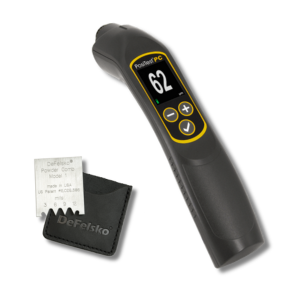
PosiTest PC PosiTest PC No
  • Non-contact Uncured Powder Thickness Gage
  • Ideal for analyzing large areas
  • Up to 4x faster measurement speed*—ideal for moving lines and swinging parts
  • No calibration adjustment required for most powders
  • Storage of 999 readings with onscreen averaging
  • No cable to risk disturbing the applied powder
  • No disadvantages – accurate, fast and easy to use
  • None
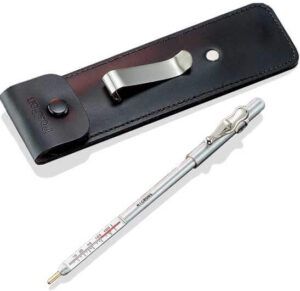
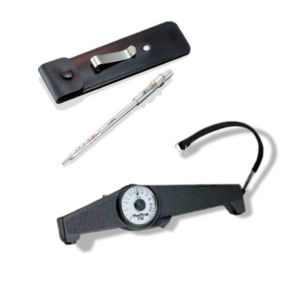
PosiPen PosiPen No
  • Steel Only
  • Magnetic Pull-Off Coating Thickness Gage
  • Refineries, petrochemical plants
  • Platers—electroplating, chrome, zinc, galvanizing
  • Powder coaters
  • Small, hot, or hard-to-reach surfaces
  • Spot Checks—conveniently fits in a shirt pocket
  • Low cost
  • Less accurate than PosiTest
  • Prone to error when reading from a dial rather than digital display.
  • Prone to damage when dropped
  • None
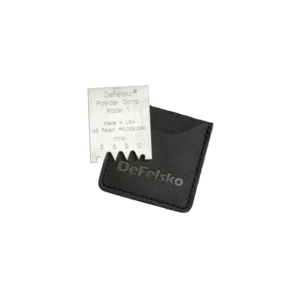
Powder Comb No
  • Uncured Powder
  • Check powder before curing to ensure correctly cured film thickness
  • Works on metal, plastic, wood, glass and a variety of substrates
  • Avoid stripping and re-coating, reducing problems with adhesion and coating integrity
  • Saves time money
  • Easy to carry – convenient shirt pocketsize
  • Marks left by gage may affect characteristics of cured film
  • Available in microns or mils
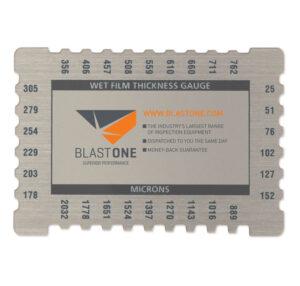
Wet Film Thickness Gage No
  • Uncured Paint
  • Measures thickness of paint, enamels and other wet films
  • Low cost
  • Disposable
  • Rough or uneven surfaces can make it hard to get a good reading
  • Not suitable for very thick coatings or those that react with gauge material
  • Aluminum 4-sided


  PosiTest PC PosiPen
PosiTest PC PosiPen Powder Comb Wet Film Thickness Gage
Available For Rent No No No No
Best Scenarios
  • Non-contact Uncured Powder Thickness Gage
  • Ideal for analyzing large areas
  • Steel Only
  • Magnetic Pull-Off Coating Thickness Gage
  • Refineries, petrochemical plants
  • Platers—electroplating, chrome, zinc, galvanizing
  • Powder coaters
  • Small, hot, or hard-to-reach surfaces
  • Spot Checks—conveniently fits in a shirt pocket
  • Uncured Powder
  • Check powder before curing to ensure correctly cured film thickness
  • Works on metal, plastic, wood, glass and a variety of substrates
  • Uncured Paint
  • Measures thickness of paint, enamels and other wet films
Benefits
  • Up to 4x faster measurement speed*—ideal for moving lines and swinging parts
  • No calibration adjustment required for most powders
  • Storage of 999 readings with onscreen averaging
  • No cable to risk disturbing the applied powder
  • Non-destructive measurement
  • Non-contact Uncured Powder Thickness Gage
  • Ideal for analyzing large areas
  • Avoid stripping and re-coating, reducing problems with adhesion and coating integrity
  • Saves time money
  • Easy to carry – convenient shirt pocketsize
  • Low cost
  • Disposable
Disadvantages
  • No disadvantages – accurate, fast and easy to use
  • Less accurate than PosiTest
  • Prone to error when reading from a dial rather than digital display.
  • Prone to damage when dropped
  • Marks left by gage may affect characteristics of cured film
  • Rough or uneven surfaces can make it hard to get a good reading
  • Not suitable for very thick coatings or those that react with gauge material
Options
  • None
  • None
  • Available in microns or mils
  • Aluminum 4-sided

Dry Film Thickness Videos

SSPC DFT PA2 Standards Explained

Measuring Paint Thickness on Steel with the PosiTest FM Magnetic Pull-Off Coating Thickness Gage

DFT Readings Made Easy By Extension Pole

How to Measure Coating Thickness using PosiTector and PosiTest Coating Thickness Gages from DeFelsko

Why DFT is Important

WHY USE A DFT GAUGE?

An integral component of coating longevity is getting the correct film build. Too low a film build and you risk delamination or insufficient protection from the environment. Too high a film can compromise the bond between coating and substrate. An essential part of a coating inspectors kit is a coating thickness gauge. There is a gauge and probe combination for almost any coating over almost any substrate. Modern dry film thickness gauges not only read the coating thickness, but the more advanced models stores the test readings, analyze and interpret them and allow them to be downloaded.

COMMON ISSUES WITH COATING THICKNESS INSTRUMENTS

Coating thickness gauges range from the very simple touch and go types to sophisticated data collection tools that measure, store and analyze the readings. The advantage of the more simple units is their low cost and simple operation. Their downside is a lesser accuracy than the more sophisticated units and the lack of compliance to the full range of corrosion control standards. Conversely, the more sophisticated units provide accurate data that is in compliance with these standards and feeds into quality assurance systems. Their downside is more complicated operation which requires a higher level of proficiency.

IMPORTANT CONSIDERATIONS FOR CHOOSING THE RIGHT DFT INSTRUMENT:

Two key questions to be asked when considering purchasing a coating thickness gauge – What level of accuracy and standards compliance do I require? and How competent is the operator who will be using the gauge? Compliance to an international coating thickness standard requested by plant owner and being used by a competent and experienced operator? The DeFelsko Positest 6000 is your gauge. Just doing some quick checks for your own information or bit intimidated by anything too geeky or techish? Select the PosiTest. Another application for the PosiTest is in Hazardous Environments. As the PosiTest is an electronic device it cannot be used in a flammable or explosive atmosphere as there always is the potential for a spark.

Types of Paint Thickness Gages

Paint Meters for All Metal Substrates

Magnetic Film Thickness Gages

Magnetic film gages (paint depth gauges) are used to nondestructively measure the thickness of a nonmagnetic coating on ferrous substrates. Most coatings on steel and iron are measured this way. Magnetic paint mil gages use one of two principles of operation: magnetic pull-off or magnetic/electromagnetic induction.

Magnetic Pull-off (Type 1 – Pull Off Coating Thickness Gages)

Magnetic pull-off gages use a permanent magnet, a calibrated spring, and a graduated scale. The attraction between the magnet and magnetic steel pulls the two together.

In Type 1 pull-off (PosiTest or PosiPen) gages, a permanent magnet is brought into direct contact with the coated surface. The force necessary to pull the magnet from the surface is measured and interpreted as the coating thickness value on a scale or display on the gage. The magnetic force holding the magnet to the surface varies inversely as a non-linear function of the distance between magnet and steel, i.e., the thickness of the dry coating. Less force is required to remove the magnet from a thick coating

Magnetic and Electromagnetic Induction (Type 2 – Electronic Coating Thickness Gages)

Magnetic induction instruments use a permanent magnet as the source of the magnetic field. A Hall-effect generator or magneto-resistor is used to sense the magnetic flux density at a pole of the magnet. Electromagnetic induction instruments use an alternating magnetic field. A soft, ferromagnetic rod wound with a coil of fine wire is used to produce a magnetic field. A second coil of wire is used to detect changes in magnetic flux.

These electronic instruments measure the change in magnetic flux density at the surface of a magnetic probe as it nears a steel surface. The magnitude of the flux density at the probe surface is directly related to the distance from the steel substrate. By measuring flux density the paint thickness can be determined.

  • Read More

    A Type 2 electronic coating thickness gage (PosiTector 6000/PosiTest DFT) uses electronic circuitry to convert a reference signal into coating thickness. Electronic ferrous paint thickness meters operate on two different magnetic principles. Some use a permanent magnet that when brought near steel, increases the magnetic flux density at the pole face of the magnet. Coating thickness is determined by measuring this change in flux density, which varies inversely to the distance between the magnet and the steel substrate. Hall elements and magnet resistance elements positioned at the pole face are the most common ways this change in magnetic flux density is measured. However, the response of these elements is temperature dependent, so temperature compensation is required.

    Other ferrous electronic paint thickness gages operate on the principle of electromagnetic induction. A coil containing a soft iron rod is energized with an AC current thereby producing a changing magnetic field at the probe. As with a permanent magnet, the magnetic flux density within the rod increases when the probe is brought near the steel substrate. This change is detected by a second coil. The output of the second coil is related to the coating thickness. These paint meters also need temperature compensation due to the temperature dependence of the coil parameters.

    What are Eddy Current Film Thickness Gages? (Type 2 – Electronic Coating Thickness Gages)

    Eddy current techniques are used to nondestructively measure the thickness of nonconductive coatings on nonferrous metal substrates. A coil of fine wire conducting a high-frequency alternating current (above 1 MHz) is used to set up an alternating magnetic field at the surface of the instrument’s probe. When the probe is brought near a conductive surface, the alternating magnetic field will set up eddy currents on the surface. The substrate characteristics and the distance of the probe from the substrate (the thickness) affect the magnitude of the eddy currents. The eddy currents create their own opposing electromagnetic field that can be sensed by the exciting coil or a second, adjacent coil.

Coating Thickness Testers for Non-Metal Substrates

How do you measure coating thickness on non-metals?

The ultrasonic pulse-echo technique is used to measure the thickness of paint and other coatings on non-metal substrates (plastic, wood, concrete, and composites) without damaging the coating.


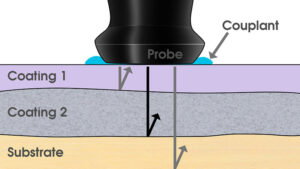
Ultrasonic coating thickness gages (e.g. PosiTector 200) emit a high frequency sound pulse that travels into the coating via a coupling gel and reflects from ANY surface that is different in density. Paint thickness readings are obtained by measuring the time taken for the ultrasonic signal to propagate from the probe to the coating/substrate interface and back. The travel time is divided by two and multiplied by the velocity of sound in the coating to obtain the thickness of the coating.

Illustration — The PosiTector 200 interprets the largest "echo" within the selected range as the coating/coating or coating/substrate echo.

The PosiTector 200 interprets the largest “echo” within the selected range as the coating/coating or coating/substrate echo.

For more information about the PosiTector 200 and paint thickness measurement on non-metal substrates:

Coating Thickness Gage for Uncured Powder Coating Thickness

How do you measure Powder Coating Thickness before and after curing?

Thickness measurements of powder can be taken before and after curing. Substrate type, thickness range, part shape, and economics determine the best method to be employed.


For uncured applied powders, height measurement can be performed with DeFelsko Powder Combs. This technique is destructive and may require recoating the part. Coating powders generally diminish in thickness during the curing process so these procedures require a reduction factor be determined to predict cured film thickness.

Non-contact ultrasonic instruments, such as the PosiTest PC Powder Checker also measure uncured powder, but do so without touching the surface. Instead of measuring powder height, they automatically display a predicted cured thickness result. Accurate measurement at the time of application: eliminates over usage, improves quality, controls set-up, reduces rework & waste  saving money.

For after-cure measurement, a variety of hand held paint meters are available. These non-destructive instruments employ either magnetic, eddy current, or ultrasonic principles depending on the substrate.

WANT TO STREAMLINE YOUR NEXT PROJECT?

Learn how to maximize your protective coating and extend the lifetime of your assets

Frequently Asked Questions

  • What is a mil? What is a micron?

    A mil, also known as a Thou, is equal to 1 one-thousandth of an inch (25.4 microns).

    A micron, sometimes called a micrometer, is equal to one-millionth of a meter or one-thousandth of a millimeter (~0.000039″).

  • If I buy a new probe do I need to buy a new body as well?

    No, the DeFelsko PosiTector 6000 system has 1 body but accepts a full range of probes. Not only coating thickness (magnetic, eddy current and ultrasonic measurement), but also surface profile, climatic monitoring, soluble chlorides contamination, infra-red temperature,ultrasonic wall thickness, hardness and gloss measurement.

  • What standards do coating thickness gauges conform to?

    The DeFelsko PosiTector 6000 advances is compliant with the widest range of standards -ISO 2178/2360/2808, ISO 19840, ASTM B244/B499/D1186/D1400/D7091/E376/G12, BS3900-C5, SSPC-PA2, US Navy NAVSEA PPI 63101-000, US Navy NAVSEA 009-32, AS 2331.1.4, AS3894.3-B, and others. The PosiTest, ASTM D7091/B499, ISO 2808 and others.

  • What substrates can be measured over using a coating thickness gauge?

    For ferrous (steel) substrates, a magnetic probe can be used. For non-ferrous metallic substrates, a gauge that operates on eddy currents is used. Eddy currents are loops of electrical current induced within conductors by a changing magnetic field in the conductor. For non-metallic substrates, an ultra-sonic probe can be used.
  • What type of coating can be measured?

    Most commonly available coating systems can be measured with a coating thickness gauge using one of the three commonly available technologies discussed above. Metallic filled coatings are not as common as previously, however should you be required to measure the thickness of one of these, a destructive test may be required. These place an angled cut in the cured coating and use trigonometry calculate the coating thickness.

  • What thickness of coating can be measured?

    Ferrous probes can range up to 80 mils/2,000 um. Non-ferrous probes 25 mils/ 625 um. Ultrasonic probes up to 300 mils /7,600 um. Two provisos – when measuring thinner coatings use the probe with the smallest range suitable, it will be more accurate at a lower range; when measuring a thicker coating (over 60 mils/1,500 um) make sure that the probe has an upper limit greater than the target thickness on the specification. It is possible when using the wrong probe to get a measurement and not realize that it is inaccurate.

  • Is the PosiTector 6000 calibrated at the factory? How often should the PosiTector 6000 be recalibrated?

    PosiTector 6000 paint meters arrive fully calibrated and include a Long-Form Certificate of Calibration traceable to NIST or PTB. The Certificate of Calibration documents actual readings taken by your instrument at our calibration laboratory, on standards traceable to a national metrology institute. Beware of ‘Certificates’ or ‘Certificates of Conformance’ offered by competitors. These typically do not include actual instrument readings, and are often insufficient to meet common quality requirements.

    PosiTector 6000 paint thickness probes include a Certificate of Calibration with no expiry or end date. They have no shelf life, therefore the length of time in the field is not a good indicator for recalibration intervals. Many organizations with quality programs and recertification programs require annual recalibrations, and this is a good starting point for most users. DeFelsko recommends that customers establish calibration intervals based upon their own experience and work environment. Based on our product knowledge, data and customer feedback, a one year calibration interval from the date the instrument was placed in service is a good starting point.

  • What can the PosiTector 6000 measure?

    PosiTector 6000 paint thickness probes have different capabilities depending on the model.

    • ‘Ferrous’ model probes (order code beginning in ‘F’
      ex. FS1) can measure non-magnetic coatings applied to ferrous (magnetic) metals, typically carbon steel.
    • ‘Non-ferrous’ model probes (order code beginning in ‘N’ ex. NRS3) can measure non-conductive coatings applied to non-ferrous metals.
    • ‘Combination model probes (order code beginning in ‘FN’ ex. FNTS1) can measure non-magnetic coatings applied to ferrous (magnetic) metals, AND non-conductive coatings applied to non-ferrous metals

  • Is the PosiTector 6000 affected by the surface roughness (profile) of the metal substrate below the coating?

    All coating thickness gages are influenced to some degree by substrate roughness, as shown in the below image. It is generally accepted that paint thickness should be measured from the highest ‘peaks’ in the rough surface thus ensuring they are covered by the protective coating. However, coating thickness gages will instead measure the coating thickness from the ‘effective magnetic plane’, which is located somewhere between the highest peaks and deepest valleys of the profile.

    ASTM D7091, ISO 19840, and SSPC-PA 2 propose several similar solutions depending upon the instrument type and the particular situation. One option is to verify the paint meter reads zero on the uncoated steel substrate, and adjust to zero if necessary. This is a popular solution when the metal surface is smooth.

    Since it is difficult to ensure that the probe tip is sitting on the highest peaks of the surface profile, the preferred option is to place a plastic shim of a known thickness that is close to the expected thickness of the applied coating between the probe and substrate and adjust to the stated thickness of the shim- referred to as a 1-point adjustment. The plastic shim sits on the peaks of the surface profile over a greater area than the probe tip, ensuring that the adjustment is being taken ‘over the peaks’. This best simulates a coating covering the peaks of the surface profile.

    If access to the bare substrate is not possible, another option is to use the PosiTector Zero Offset feature in accordance with ISO 19840. The Zero Offset adjustment is useful when measuring paint and coating thickness over rough or blasted substrates without access to the uncoated representative substrate. Predefined Zero Offset values can be selected according to the blast profile height. Alternatively, a custom Zero Offset can be entered.

  • When do I buy the PosiTest DFT instead of the PosiTector 6000? Can the PosiTest DFT store or print data?

    The PosiTest DFT is a simple, economical solution for those who have no need for the innovative features of the PosiTector 6000 Standard or Advanced models including higher resolution and accuracy, internal memory, PosiSoft software compatibility and universal probe interchangeability. The PosiTector 6000 was designed for the harshest of environmental conditions. The impact resistant, high grade industrial strength housing is solvent, acid, oil, water and dust resistant. PosiTector 6000 Advanced models have additional features including increased memory storage, scan mode, SSPC PA2/PSPC-90/10 modes and WiFi wireless technology for connecting to mobile devices.

    The PosiTest DFT has a running average mode which provides the average for up to 99 measurements. The readings, however, are not stored in memory. Once the gage is powered off, the readings are erased. The PosiTest DFT cannot print readings.

  • What does the PosiTest DFT offer that other low-cost gages don’t?

    We’ve packaged PosiTector 6000 probe technology in a smaller, simpler, more economical platform. The PosiTest DFT is designed for users who don’t need memory or downloading features- just the quality probe technology that DeFelsko is known for. Our reliable ruby-tipped probes are wear-resistant and measure accurately — both out-of-the-box and after extended use. There is no need for repeated calibration adjustments like with cheaper instruments. The PosiTest DFT is a simple gage that retains proven DeFelsko quality.
  • Why should I purchase the PosiTest over the PosiPen? Why should I purchase the PosiPen instead of the PosiTest?

    Compared with the PosiPen, the PosiTest provides superior accuracy and improved ease-of-use by using a large dial to increase spring pressure, and by holding the displayed gage reading after being removed from the coated part. The PosiPen is ideal for small, hot or hard-to-reach surfaces.

    The PosiPen is ideal for measuring non-magnetic coating thickness with pinpoint accuracy on ferrous metal parts with temperatures ranging from -100C to +230C (-150F to +450F). The PosiPen uses a very small magnet can be precisely placed on extremely small parts and on coated surfaces which cannot be accessed by other, larger gages.

  • Are coating thickness gages affected by the roughness of the steel substrate below the coating?

    All coating thickness gages are influenced to some degree by substrate roughness. It is generally accepted that coating thickness should be measured from the highest ‘peaks’ in the rough surface thus ensuring they are covered by the protective coating. However, coating thickness gages will instead measure the coating thickness from the effective magnetic surface, which is located somewhere between the highest peaks and deepest valleys of the profile.

    To compensate for the influence of substrate conditions (including roughness), measure the uncoated substrate/part at a number of spots to obtain a representative average value. This average value is called the “base metal reading” or “BMR”. Subtract the BMR from subsequent coating thickness measurements to obtain the thickness of the coating over the ‘peaks’ of the rough surface.

  • Can the PosiTest measure nickel on steel? Does the PosiTest measure on hot surfaces? Can the PosiTest be used underwater?

    Can the PosiTest measure nickel on steel?

    Yes, but it depends upon the particular type of nickel coating that has been applied to the steel.

    When nickel plating is deposited by a process of electrolysis (employing an electric current in the nickel bath), the resultant coating – commonly called “e-nickel” – is always conductive and magnetic to some degree and cannot be accurately measured by our gages when applied to ferrous or non-ferrous metals.

    Electroless nickel coatings are deposited by an autocatalytic process which does not involve the addition of an electric current. If the nickel bath in this process contains a minimum concentration of ~8% phosphorus, the resulting nickel plating is effectively non-magnetic and its thickness can be accurately measured on ferrous steel with a magnetic principle coating thickness gage such as the PosiTest.

    Does the PosiTest measure on hot surfaces?

    The operating temperature range of the PosiTest depends on the use case. The first case is where the measurement surface and the gage are both at the same temperature;  in this case the operating range would be -10°C to 60°C (14°F to 140°F). The other case is where the PosiTest is at a “normal” room temperature but the measurement sample may be at a different temperature. In this case the PosiTest can measure on surfaces with temperatures ranging from -50°C to 100°C (-58°F to 212°F), so long as the instrument itself is kept within its operating range.

    Can the PosiTest be used underwater?

    Yes. The PosiTest features corrosion-resistant brass construction and can be immersed in fresh or saltwater. When used in saltwater, it is recommended to rinse with freshwater after use.

  • Can the PosiPen measure coatings on small diameter wire? Can the PosiPen measure nickel on steel? Does the PosiPen measure on non-ferrous metals, like aluminum?

    Can the PosiPen measure coatings on small diameter wire?

    Yes. The PosiPen will accurately measure the thickness of non-magnetic coatings on a ferrous 18 AWG and larger wire.

     Can the PosiPen measure nickel on steel?

    Yes, but it depends upon the particular type of nickel coating that has been applied to the steel.

    When nickel plating is deposited by a process of electrolysis (employing an electric current in the nickel bath), the resultant coating – commonly called “e-nickel” – is always conductive and magnetic to some degree and cannot be accurately measured by our gages when applied to ferrous or non-ferrous metals.

    Electroless nickel coatings are deposited by an autocatalytic process which does not involve the addition of an electric current. If the nickel bath in this process contains a minimum concentration of ~8% phosphorus, the resulting nickel plating is effectively non-magnetic and its thickness can be accurately measured on ferrous steel with a magnetic principle coating thickness gage such as the PosiPen.

    Does the PosiPen measure on non-ferrous metals, like aluminum?

    No. As a magnetic principle instrument, the PosiPen will measure the thickness of non-magnetic coatings applied to ferrous metals. Our popular PosiTest DFT Combo and powerful PosiTector 6000 N gage models are ideal for measuring the thickness of paint, anodize and other non-conductive coatings applied to non-ferrous metals.

  • Can the PosiPen be adjusted? Does the PosiPen need to be calibrated?

    No. The PosiPen uses a precision, permanently- calibrated spring which will never require adjustment.

Related Equipment

TechnologyDay_Qlayers

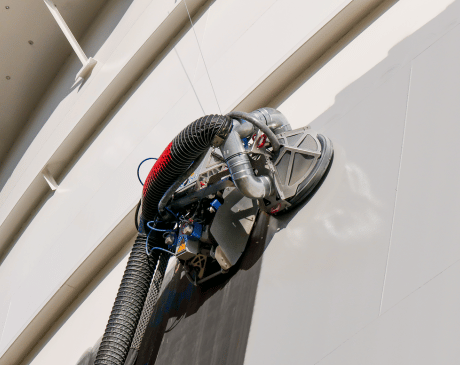
Qlayers Coating Robot

nylon HFNHAFL Nozzle Threaded Adaptors

Nozzles Thread Adaptors

Nozzle Pressure Test Kit

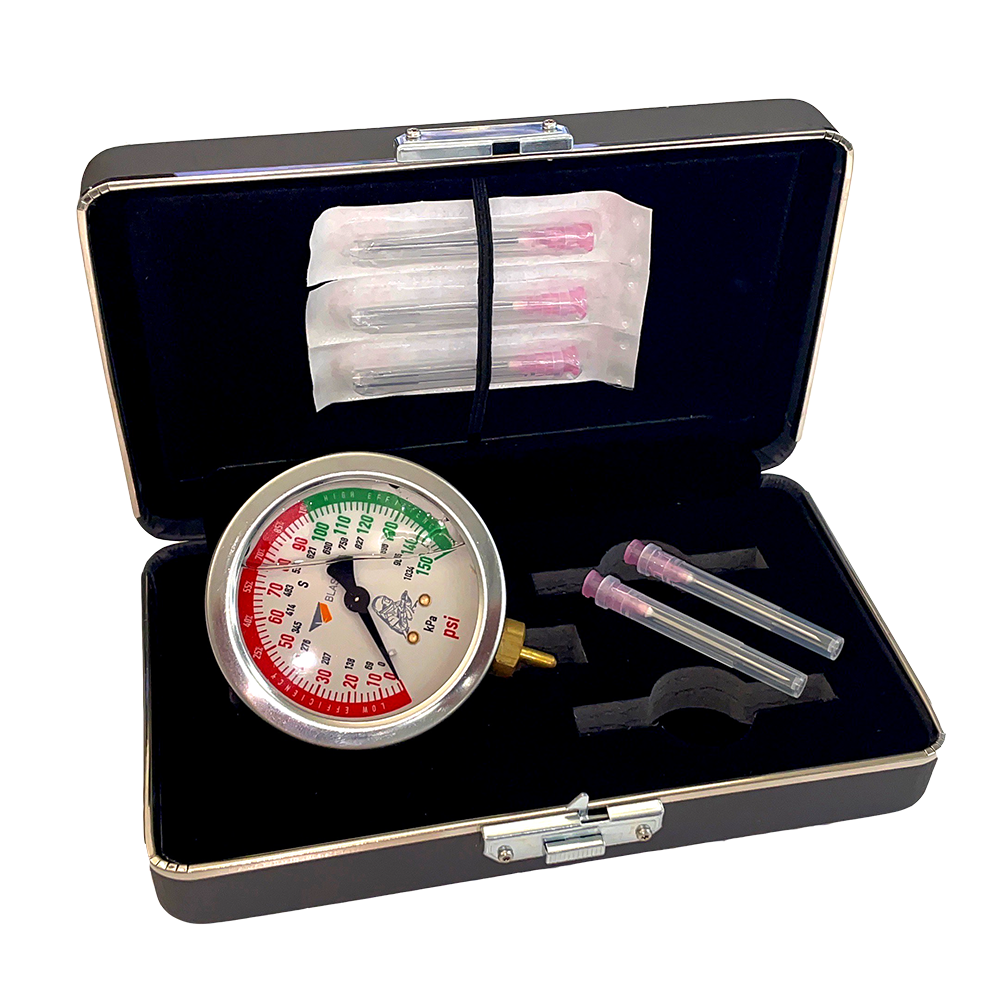
Nozzle Pressure Test Kit

HFG25P NW-25 Nozzle Washers (Packet 10)

Snakebite XQ Blast Nozzle

Contact BlastOne

We love to talk to customers and help them make the best decisions when purchasing equipment.
You can reach us via our Live Chat, Email, Phone, and Online Form.

Add to quote:

Registration is required to create a Quote.

Click Here to Login or Register.

Add to existing quote:

Add to Quote

Add to a new quote:

Send the request

BlastOne says
Thank you for submitting your quote. A sales representative will follow up with you asap.
Share Quote via Email

Share