PosiSoft Desktop
Powerful desktop software for downloading, viewing, printing, and storing measurement data. Includes customizable, templated PDF Report Generator. No internet connection required.
 My Account
Catalog | Locations | Bulk Order | Quote List
Fast, Accurate, and Ready to Use: This gauge utilizes magnetic and eddy current principles to deliver quick and reliable measurements on both ferrous and non-ferrous metals. Minimal setup is required for most applications, making it ready to measure right out of the box.
Durable and Built to Last: The PosiTector boasts a weatherproof, dustproof, and water-resistant (IP65-rated) enclosure for protection in harsh environments. The wear-resistant ruby probe tip ensures long-lasting performance with minimal calibration drift.
Enhanced User Experience: Navigate menus easily with the large, 2.8″ impact-resistant color touchscreen. The redesigned keypad allows for quick selection of desired functions.
Versatility with PosiSoft and Interchangeable Platform:
Connect to PosiSoft software on PCs, Macs, and smartphones via USB, WiFi, or Bluetooth for data transfer and analysis.
The PosiTector integrates with the PosiTector interchangeable platform, allowing you to use various probes with a single gauge body for different measurement needs.
Confidence in Your Measurements: Each gauge comes with a certificate of calibration traceable to NIST or PTB, guaranteeing the accuracy of your readings.
Complies with Industry Standards: The PosiTector conforms to a wide range of international and national standards, including ISO (2178/2360/2808, 19840), ASTM (B244/B499/D1186/D1400/D7091/E376/G12), BS (3900-C5), SSPC-PA2, US Navy (NAVSEA PPI 63101-000, NAVSEA 009-32), and AS (2331.1.4, 3894.3-B).
| Our most popular Integral and Cabled probe models | 90° Regular probe for tight spots | Ideal for duplex coating systems | Ideal for hot and rugged applica-tions | Ideal for anodized aluminum | Microprobes – Our smallest probes for small parts or hard-to-reach areas | Integral and Cabled probes for thick protective coatings; epoxy, rubber, intumescent fireproofing and more | |||||||||||||
 |
 |
 |
 |
 |
 |
 |
 |
 |
 |
 |
 |
 |
 |
 |
 |
 |
 |
||
| FERROUS | Standard Body | F1 | FS1 | FRS1 | FXS11 | F0S1 | F45S1 | F90S1 | F90ES1 | FT1 | FTS1 | FTRS1 | FKS1 | FJS1 | FLS1 | ||||
| Advanced Body | F3 | FS3 | FRS3 | FXS31 | F0S3 | F45S3 | F90S3 | F90ES3 | FT3 | FTS3 | FTRS3 | FKS3 | FJS3 | FLS3 | |||||
| Probe Only | PRB F |
PRB FS |
PRB FRS |
PRB FXS1 |
PRB F0S |
PRB F45S |
PRB F90S |
PRB F90ES |
PRB FT |
PRB FTS |
PRB FTRS |
PRB FKS |
PRB FJS |
PRB FLS |
|||||
| NON-FERROUS | Standard Body | N1 | NS1 | NRS1 | NAS1 | N0S1 | N45S1 | N90S1 | NKS1 | ||||||||||
| Advanced Body | N3 | NS3 | NRS3 | NAS3 | N0S3 | N45S3 | N90S3 | NKS3 | |||||||||||
| Probe Only | PRB N |
PRB NS |
PRB NRS |
PRB NAS |
PRB N0S |
PRB N45S |
PRB N90S |
PRB NKS |
|||||||||||
| COMBINATION | Standard Body | FN1 | FNS1 | FNRS1 | FNDS13 | FNTS1 | FNGS14 | ||||||||||||
| Advanced Body | FN3 | FNS3 | FNRS3 | FNDS33 | FNTS3 | FNGS34 | |||||||||||||
| Probe Only | PRB FN |
PRB FNS |
PRB FNRS |
PRB FNDS3 |
PRB FNTS |
PRB FNGS4 |
|||||||||||||
| Range |
0–60 mils 0–1500 µm |
0–80 mils 0–2000 µm |
Ferrous: 0–45 mils and 0–1150 µm Non-Ferrous: 0–25 mils and 0–625 µm |
0–250 mils 0–6 mm |
0–400 mils 0–10 mm |
0–500 mils 0–13 mm |
0–1.0 in. 0–25 mm |
0–1.5 in. 0–38 mm |
0–2.5 in. 0–63.5 mm |
||||||||||
| Accuracy⁵ |
±(0.05 mil + 1%) 0-2 mils ±(0.1 mil + 1%) >2 mils ±(1 µm + 1%) 0-50 µm ±(2 µm + 1%) >50 µm |
±(0.02 mil + 1%) 0-4 mils ±(0.1 mil + 3%) >4 mils ±(0.5 µm + 1%) 0-100 µm ±(2 µm + 3%) >100 µm |
±(0.5 mil + 1%) 0-100 mils ±(0.5 mil + 3%) >100 mils ±(0.01 mm + 1%) 0-2.5 mm ±(0.01 mm + 3%) >2.5 mm |
±(0.1 mil ±3%) ±(2 µm + 3%) |
±(1 mil + 3%) ±(0.02 mm + 3%) |
±(0.01 in. + 3%) ±(0.2 mm + 3%) |
|||||||||||||
Matching DeFelsko Calibration Standards |
STDS1 STDA1 |
STDS4 | STDS2 STDA2 |
STDP1 | STDP7 | STDP5 | STDP2 | STDP8 | |||||||||||
Ferrous probes are used to measure non-magnetic coatings on ferrous metals, while Non-Ferrous probes are designed for measuring non-conductive coatings on non-ferrous metals.
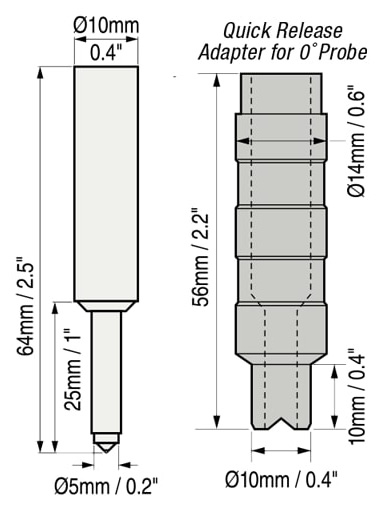
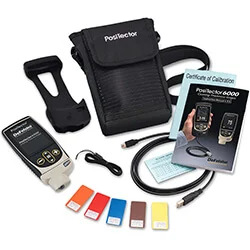
F0S & N0S WITH ADAPTER
SIZE:
127 x 66 x 25.4 mm (5″ x 2.6″ x 1″)
WEIGHT:
137 g (4.9 oz.)
without batteries
| Compare Features | 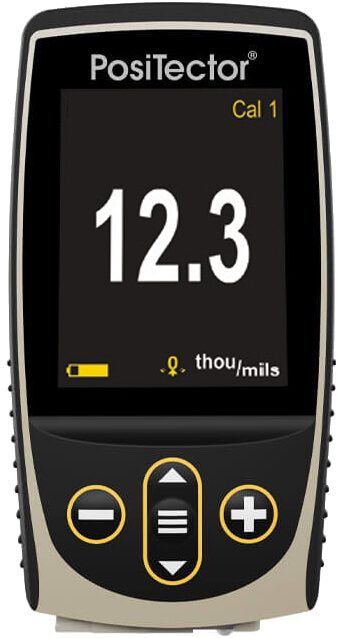 Standard |
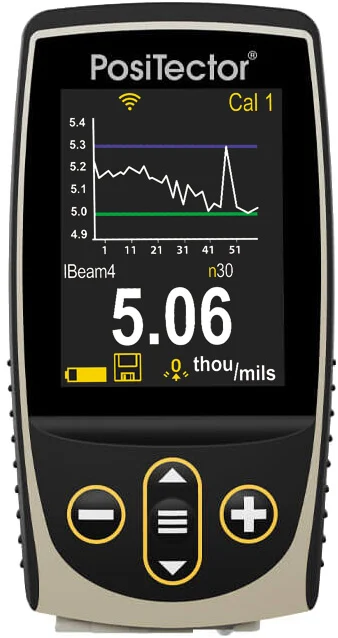 Advanced |
| Larger 2.8″ impact resistant color touchscreen with redesigned keypad for quick menu navigation | ||
| On-gage help explains menu items at the tap of a button | ||
| Weatherproof, dustproof, & water-resistant – IP65-rated enclosure | ||
| Ergonomic design with durable rubberized grip | ||
| Auto rotating display with Flip Lock | ||
| Extended cables available (up to 75 m or 250 ft) for underwater or remote measuring | ||
| Screen Capture – save 100 screen images for record keeping and later review | ||
| Instant-on feature quickly powers up the gage if recently turned off | ||
| Up to 30% longer extended battery life | ||
| Reading Storage Capacity | 1,000 per probe | 250,000 in up to 1,000 batches |
| Live graphing of data measurement | — | |
| Prompted Batch Mode – create pre-defined batches with on-screen text and image prompts for readings | — | |
| 3 Scan Modes – increase measurement speed to 180+ readings per minute Normal – take continuous readings without lifting up the probe Statistics – take continuous readings & record average, standard deviation, minimum/maximum thickness and number of readings while scanning Limited Count Average – take continuous readings up to a user-specified count. The gage displays and records the average of the readings. |
— | |
| Touchscreen keyboard for quickly renaming batches and adding notes | — | |
| Multiple stored calibration adjustments for measuring on a variety of substrate conditions | — | |
| SSPC-PA 2, ISO 19840, and IMO PSPC 90/10 modes help users comply with standards by prompting for minimum/maximum specifications, displaying the necessary readings, and automatically calculating statistics with a pass or fail result | — | |
| WiFi technology wirelessly synchronizes with PosiSoft & downloads software updates | — | |
| Bluetooth Technology 4.0 for data transfer to a mobile devices running the PosiTector App or optional portable printer. BLE API available for integration into third-party software | — | |
| Integrate with 3rd party software, aerial drones, ROVs & PLCs, and robotic devices using several industry-standard communication protocols | — |
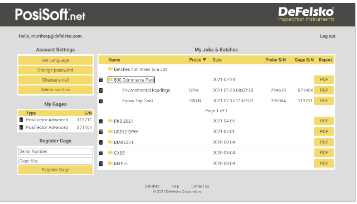
PosiSoft offers secure cloud storage for all your measurement data, including jobs, batches, readings, and report templates. This allows you to access and share your data from any device, synchronize between instruments and computers, and generate reports on the go – all conveniently from a web browser. For more information and detailed instructions, visit the PosiSoft.net website.
Powerful desktop software for downloading, viewing, printing, and storing measurement data. Includes customizable, templated PDF Report Generator. No internet connection required.
A web-based application offering secure centralized management of readings. Includes customizable, templated PDF Report Generator. Access your data from any web-connected device.
Mobile app connects PosiTector Advanced instruments, the PosiTector SmartLink and the PosiTest AT-A to your iOS or Android smart device.
A simple gage interface to retrieve data in a manner similar to USB flash drives, cameras, or digital audio players. No software to install or internet connection required.
• Ideal for use in the calibration lab, in the field or on the factory floor
• Intended for probes that measure thick coatings
• Certified and labeled in both Metric and Imperial units
• Available in various thickness ranges for both ferrous and non-ferrous coatings
• For use with all Type 2 electronic coating thickness gauges
• Available as certified in a set of 8 or individual shims
• Also available as uncertified in a set of 5
• Uncertified are less accurate but are an inexpensive way perform a quick operational check
• Available in various configurations to match each probe style
• Useful standards check zero reading accuracy
• Select from a variety of gauge bodies and probes
• Many standard package options are available – Contact us to build a custom version for your needs!
One common approach is ensuring the gauge reads zero on an uncoated steel substrate, adjusting it to zero if needed. This method is preferable for relatively smooth metal surfaces. Given the challenge of ensuring the probe tip only contacts the surface’s highest peaks, another strategy involves using a plastic shim with a known thickness—approximating the expected coating thickness—between the probe and substrate. This adjustment, known as a 1-point adjustment, uses the shim to cover a wider area of the surface’s peaks than the probe tip alone could, ensuring the calibration accounts for measurements “over the peaks.” This technique effectively mimics how a coating would cover the surface profile’s peaks.
Registration is required to create a Quote.
Click Here to Login or Register.